Sharon and I decided to get the kids a pool and ended up buying the Intex® 12' by 30" Metal Frame Pool Set (SKU: 28211EH). I use the term ended up buying because stock was so low everywhere we looked, we were lucky to find anything at all.
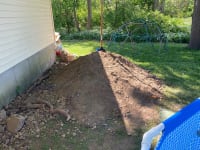
While we waited for it to arrive, we knew we had to level an area of our sloped yard, so we decided to dig the high side down instead of building the low side up because we’re I’m cheap and didn’t want to buy the necessary materials. It’s free to dig, I declared, and I could foresee built-up material being washed out by heavy rain, and I ain’t having that.
The whole family got involved and we took photos of most of the process:
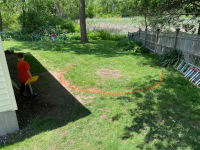
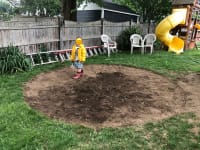
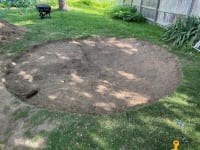
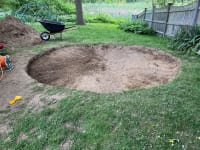
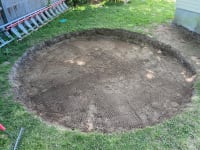
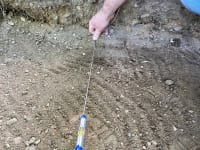
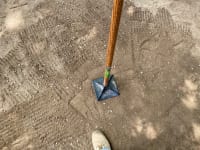
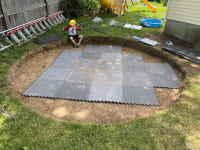
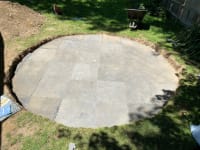
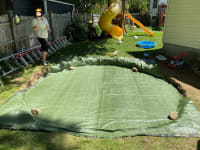
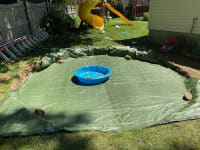
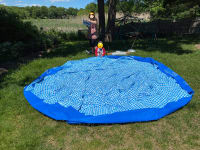
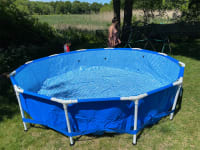
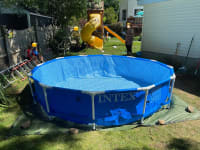
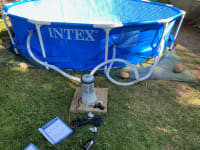
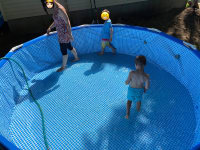
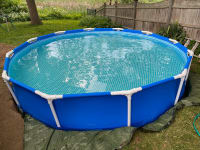
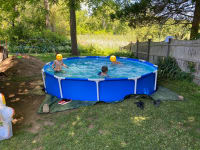
We decided where we wanted the center of the pool to be, put a stake in the ground, tied a six-foot long string to it, and used some orange spray paint to define exactly where we needed to dig.EnlargeFirst, we dug up the sod along the orange line…Enlarge…then we dug up the rest of it.EnlargeThen we started digging down, because this section of the yard is far from level.EnlargeWe kept digging…Enlarge…and digging. When we thought we might be close to having a level surface…Enlarge…I used a string level to check. We repeated the dig and check routine until, eventually, it was good enough for pool Jazz.EnlargeWe then used an 8 x 8 inch tamper to help flatten and compress the small rocks and loose dirt.EnlargeOnce the surface seemed flat and compacted enough, we put interlocking rubber mats down hoping they’d protect the pool from any small rocks we didn’t remove and make it a little more comfortable. This was when it became clear just how uneven the surface still was, which was a little sad, but we pushed on…Enlarge…and finished after making some basic cuts and running a broom over it a few times.EnlargeNext, we put down a 12 by 16 foot tarp. It’s smaller than I’d prefer, but it was the only one we had on hand and we wanted to keep moving forward. Next spring, before we set the pool up again, we’ll replace it with a larger one.EnlargeWe put a toddler’s plastic pool in the center of the hole and said, “The new pool’s ready!” to our kids; their reactions ranged from genuine concern to exaggerated eye-rolling, so I punched a new hole on my Dad Card®EnlargeWith the ground pretty much done, it was time to start building the (real) pool; the instructions suggested rolling it out and letting it warm up in the sun for a while to make it easier to work with, so that’s what we did.EnlargeIt was much easier than expected to set up its frame and legs; it probably took us ten minutes at most.EnlargeWe carried it over to the hole and plopped it in, then realized the hole was just a little too small; a couple of the legs had to be angled inward and inch or two. That said, once it was filled with water, the liner bulged out and pinned the legs in position, so we didn’t bother to make any corrections. Next spring, before setting it up again, we’ll widen the hole a bit.EnlargeSetting up the connections, hoses, and the filter-pump was relatively easy.EnlargeThe instructions suggest walking around in the pool and nudging the liner’s floor outward with your feet as it fills up with water; it worked, because there are no annoying wrinkles.EnlargeAll three boys got their bathing suits on and hopped in … but it was cold. Only the oldest boy stuck with it for more than 10 minutes because, well, he’s part fish.EnlargeThree and a half hours and 1,720 gallons later, it was full…Enlarge…so the boys jumped back in and had the time of their lives.EnlargeAll that remains is getting rid of this pile of dirt and rocks.Enlarge
It’s been about a month since we set the pool up and there are a few things we’ve learned along the way, and plenty of things we still need to figure out:
As shown above, the hole would benefit from being a little wider and flatter.
The tarp is too small; on two sides it doesn’t go up and over the wall of dirt, and that dirt has caved in. Nothing bad has come of that, yet, but it wouldn’t surprise us if it becomes a problem before the season ends.
We thought we’d need a ladder, but even our youngest boy can hop in / out on his own.
We have no idea how long the pump should run and the manual only says Filter run time depends on pool size, weather and usage level. So, we tend to let it run for about 8 hours a day on days we think the pool will be used … but we’re not sure if it should run every day, regardless of use — time will tell as we figure this out.
Also, the chemicals … ugh, we’re still figuring that out, too. For example:
When do we need to use 'shock'?
How often do we replace the chlorine tablets?
How many chlorine tablets … which size tablets?
The instructions on these things are very hand-wavy with specifics—just like the pump’s manual, it all depends on weather, usage level, etc. So, we picked up a water testing kit and our first test showed that our water was a little too acidic; a quick search told us we could add baking soda to move the needle closer to alkaline, so that’s what we did and a few hours later the water looked much better.